The reason I have come up with this step by step overview of themeing input forms was that I was working with CCK created content types myself and was trying to figure out how to change the order of the fields of the input form. What I found in the forums was very technical (pointers to the API in 'developer speak') or incomplete, or simply did not cover input forms. There was a lot of help for people looking to modify/theme output, but nothing clear and concise for theming input forms.
So, as a non-developer, semi-technical, marketing/business type person, I set out to discover how to 'theme' my input forms. (All those developers and others that are better informed than I, please feel free to correct me where I am wrong!) I found there are at least two different ways to theme input forms:
- Using the Form API (creating new .module files programmed in php and using things like 'hook_form_alter')
- Creating tpl.php files
I have found that it is far easier to use the second method. You actually end up having to do a little more than create a custom tpl.php file - you have to modify template.php, which requires a little bit of PHP knowledge as well as work with stylesheets (either edit style.css or create a new one and link it to your theme - more on this later).
First off, there are a couple people who are responsible for the bulk of the content in the tutorial and deserve proper credit: Lyal (
http://www.harostreetmedia.com) - thanks for emailing code snippets in the middle of the night. Dublin Drupaller (
http://www.dublindrupaller.com) - thanks for the rich depth of knowledge you share with others on the forums from which I have gleaned and repurposed much. jghyde - who has helped out others on this very same quest. Nick Lewis (
http://www.nicklewis.org) - whose website is full of helpful and insightful Drupal information.
Now on with the show.
How do you theme a CCK input form?
Assumptions
- You understand a little CSS (how it works, how you use class= and id= in HTML tags to style the output)
- You understand a little PHP (nothing serious, at least the ability to understand what a PHP code snippet is doing so you can copy it and modify it a little)
- You have CCK installed and know how to create content types with it (although I am referring to CCK input forms in this tutorial, I am pretty sure these are the same steps you would use for any custom node type)
Steps
Step 1: Create your CCK content type
Step 2: Create a [yourcontenttype].tpl.php file
Step 3: Modify template.php
Step 4: Modify style.css
You should be able to modify the input form, pretty much anyway you want with this method. For this example, I am going to do the following: Not show some of the automatically generated 'location' fields (I have 'location' module installed and enabled for my CCK content type), then create my own 'collapsible' group and put the elements that I want to in that group, and put some of the input fields side by side instead of each one being on a new line.
Even with the method I am using, there are different ways to accomplish the same thing; for example, I am using tpl.php to order the fields and .css to style them. I think I could just as easily use .css to do everything (but I am no CSS guru) and only use the custom tpl.php file to assign new <div>'s.
Step 1: Create your CCK content type
Create a CCK content type called 'event_listing' and add some fields to it. I have added contact information, location, event information fields etc.
Create at least one node (create an event listing with your new content type).
Step 2: Create a [yourcontenttype].tpl.php file
Now create a text file called 'event_listing_edit.tpl.php' and put it in the directory of your selected theme (which is somewhere under the '/theme/' directory. For example, my template.php file is found here: /theme/internet_jobs/). You could call this pretty much anything, but it will make a lot more sense and be easier to manage if you call it something like this.
Now add the following PHP code snippet to the tpl.php file - this is simply sample text to prove that your 'next step' (modifying template.php) is actually working.
<?phpprint("yahoo, it works!"); ?>
Step 3: Modify template.php
Now the hard part - we need to open and edit your template.php file which is again in the directory of your selected theme (in my case it is located here: /theme/internet_jobs/template.php)
You will need to add two seperate functions in this file, one to call your custom event_listing_edit.tpl.php file when the form is being edited and another one to call it when a NEW node is to be created (you only need one tpl.php file, but as the template.php file modifications are overriding default functionality, it is necessary to instruct drupal to use the custom file for each case.
At the end of the template.php file, add the following snippets which you should be able to see is two seperate override functions:
<?php// Add Form Start (jghyde)if ((arg(0) == 'node') && (arg(1) == 'add') && (arg(2) == 'content_event_listing')){
  function phptemplate_node_form($form) {
    return _phptemplate_callback('event_listing_edit', array('user' => $user, 'form' => $form));
  }
}// Add Form End

// Edit Form Start (Dublin Drupaller)if ((arg(0) == 'node') && (arg(2) == 'edit')){
  $node = node_load(array('nid' => arg(1)));
  function phptemplate_node_form($form) {
    return _phptemplate_callback('event_listing_edit', array('user' => $user, 'form' => $form));
  }
}// Edit Form End?>
You can see from the snippets who actually wrote them (although I have modified them slightly from their original) - thank you jghyde and Dublin Drupaller (
http://drupal.org/node/85908).
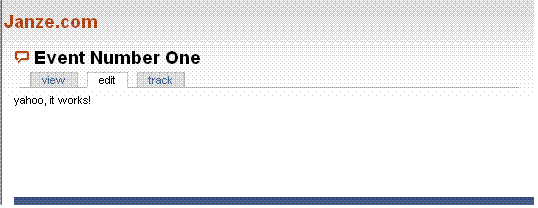
Now try to edit your event_listing node you should see the text 'yahoo, it works' on the page - see screenshot. If you don't get the 'yahoo' message, there a couple of 'suspects' to look at: go check out your naming convention in the template.php file, I tripped up and referred to my tpl.php file incorrectly a few times before I got it right.
The next step is to add all the fields you want back onto the input form. You can find out what fields are available to your form by putting the following line of code in your custom tpl.php file (Tip from
goose2000 for outputting data into a nicer format)
<?phpprint("yahoo, it works!<br>");
print("<pre>");print_r(array_values($form));
print("</pre>");?>
You will see a great big long list of information describing the fields available to your input form, the part you are interested in looks like this (there will be a section like this for every field and object on the form):
[field_website] => Array
  (
    [0] => Array
      (
        [value] => Array
          (
            [link] => www.janze.com            [title] => Janze.com
            [attributes] =>
          )
      )
  )
In this example, if I want to refer to the website URL, I would refer to it like this:
<?php['field_website']['0']['value']['link'] ?>
. So if I want to add the website URL to my input form I would add the following line to my tpl.php file:
<div id="jpj8"><?php print form_render($form['field_website']['0']['value']['link']); ?></div>
(I have wrapped the line in a 'div id=' tag so I can style it using CSS)
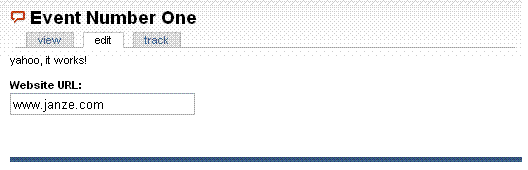
Now if I edit my event_listing node, I will get something that looks like this:
Don't forget to delete the test line that adds 'yahoo, it works!'.
Now go ahead and add the rest of the fields you want to the form.
If you want to make a group of fields that collapse, all you have to do is wrap those particular fields with <fieldset class=" collapsible"></fieldset> and if you want the Group to have a name add <legend>Contact Info</legend> right after the opening fieldset. Here is an example:
<div class="jpj8aa">
  <fieldset class=" collapsible">
    <legend>Contact Info</legend>
    <div id="jpj8"><?php print form_render($form['field_name']); ?></div>
    <div id="jpj8a"><?php print form_render($form['field_email']); ?></div>
    <div id="jpj8b"><?php print form_render($form['field_phone_0']); ?></div>
    <div id="jpj8c"><?php print form_render($form['field_website']['0']['value']['link']); ?></div>
    <div id="jpj8e"><?php print form_render($form['field_description']); ?></div>
  </fieldset>
</div>
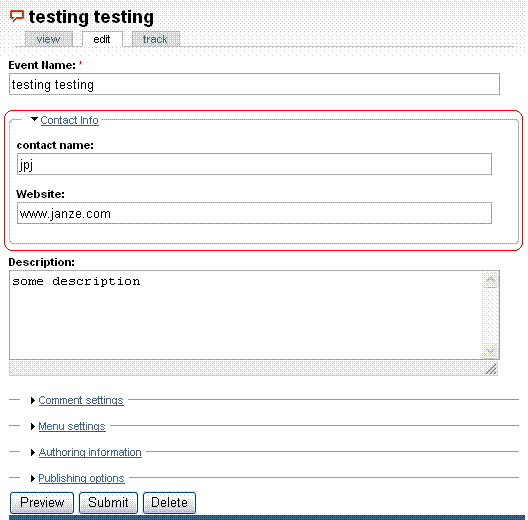
This will look like:
Interesting bits
It is a bit odd, but at the end of your tpl.php file you put the
<?phpprint form_render($form); ?>
line which will render all remaining form objects (fields and buttons) that have not previously been referred to. That means it will now display all fields that you have not explicitly added in previous lines of code. Now, if you are like me, the reason you didn't explicity add them to the form is because you DON'T want them to be there!
So, to get rid of the fields that have now been automatically added back in, I have found two methods, one that worked for me (that I am sure is 'wrong' because it isn't very elegant) and another that is very elegant, but didnt' work for me. I would definitely try the 'elegant' route first......which is, you have to override unwanted fields explicity in your template.php file. For example, if I do not want to display the website, I put this text
<?php
 $form['field_website'] = ''; ?>
in the template.php file, inside your override function (before the callback). Reading this line of code shows us that we identify the field on the form and set its value to '' - nothing. Here is what the function would look like:
<?php// Add Form Start (jghyde)if ((arg(0) == 'node') && (arg(1) == 'add') && (arg(2) == 'content_event_listing')){
  function phptemplate_node_form($form) {
    $form['field_website'] = '';
    return _phptemplate_callback('event_listing_edit', array('user' => $user, 'form' => $form));
  }
}// Add Form End

// Edit Form Start (Dublin Drupaller)if ((arg(0) == 'node') && (arg(2) == 'edit')){
  $node = node_load(array('nid' => arg(1)));
  if ($node->type == 'content_event_listing'){
    function phptemplate_node_form($form) {
      $form['field_website'] = '';
      return _phptemplate_callback('event_listing_edit', array('user' => $user, 'form' => $form));
    }
  }
}// Edit Form End?>